Unity Cloud Build Tutorial and Review

Cloud Build is a service that Unity offers that allows the automatic build, deploy, and testing of your games. I’ve been using it for over a year now and it’s one of the better solutions for continuous deployment on the Unity platform. In this tutorial I will go over steps on how to set it up for your project and provide my thoughts on the pros and cons of using Unity Cloud Build.
Cloud Build allows windows users to develop and deploy to iOS without ever touching a Mac (you actually need to touch it once).
Overview
Cloud Build works by pulling the latest changes from your code repository and building your project remotely. You can set up different platform targets (such as iOS and Android) and configure tests to automatically run after a deployment.
The general workflow looks something like this:
- Commit changes to repository
- Trigger an automatic or manual build
- Cloud Build will build and deploy to configured targets
- Upon build completion, tests will run
You can even set up builds from different git branches, target platforms, and test targets.
Cloud Build Tutorial
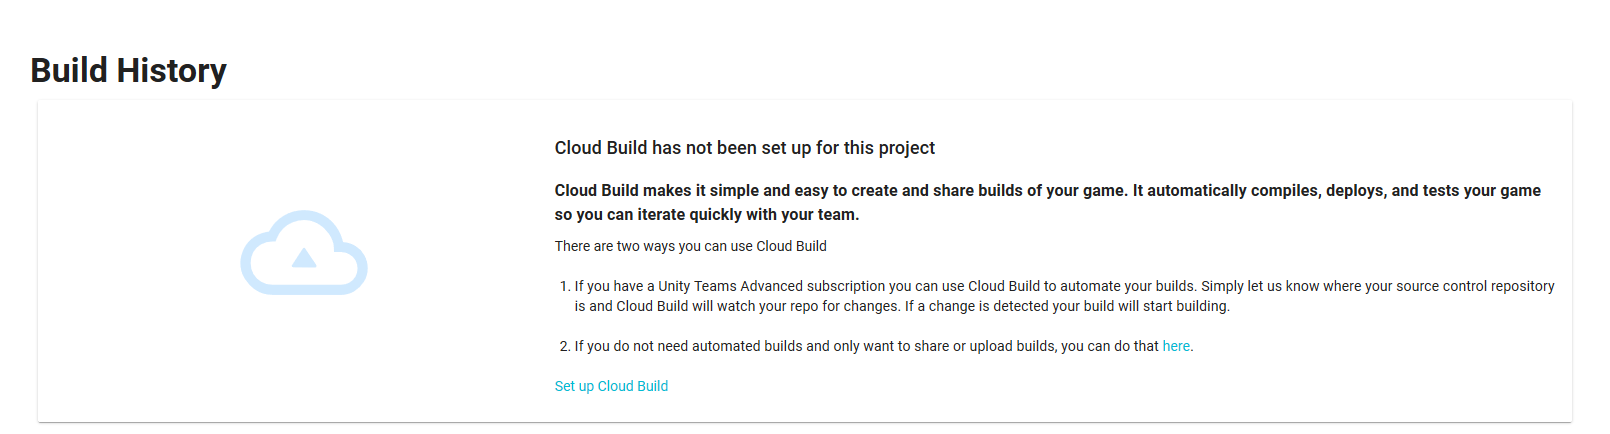
To get started, navigate to the cloud build dashboard. You’ll need to have created a Unity Services project first, but that is pretty straight forward.
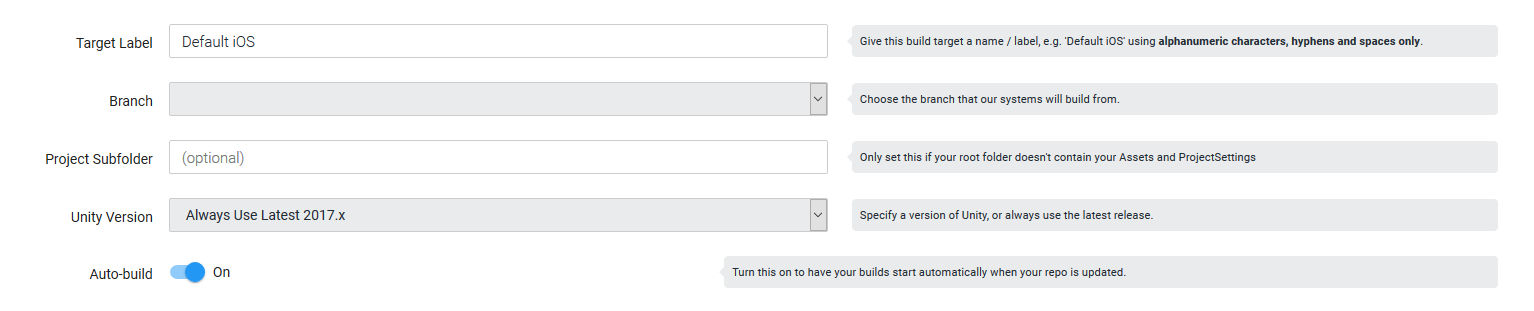
The first time you visit the cloud build dashboard, it will prompt you to setup your build.
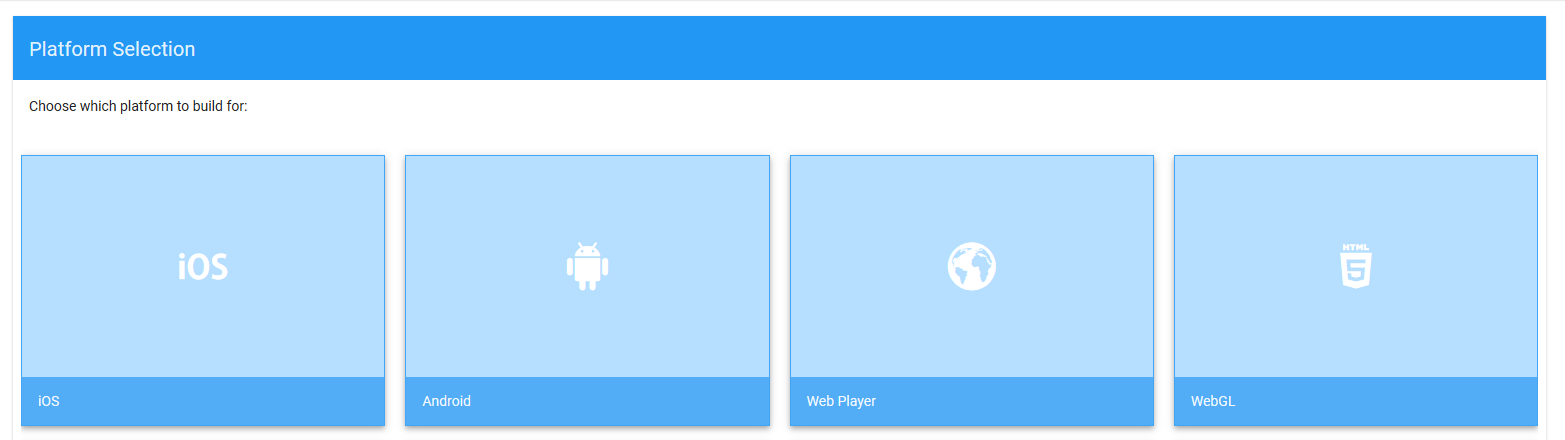
Cloud Build supports GitHub, BitBucket, and GitLab out of the box (although you can also specify your own custom repository). After you setup your repository (authentication) you will be prompted to select your build target platforms.
Not much to comment on the settings here, but one thing I do recommend is to specify the version of Unity to use when building.
This reduces the chance of unknown build failures. Most unity version bumps are backwards compatible but there’s the chance that bugs in the build process are not caught until later in the release cycle. For that reason, I prefer to use a static version of Unity.
Certificates and iOS Cloud Build
The next step is to setup any signing certificates and credentials that may be required for the platform. For iOS builds, you will need to provide a provisioning profile and a p12 File. The great news though is that after you setup the profile, you’ll be able to build iOS builds via Cloud Build. This is a HUGE time saver for developers who primarily develop on windows. I would use Cloud Build just for this feature alone.
After setting up your build target, you’ll be able to kick off new builds and monitor the progress from the history dashboard. The builds generally take longer than building locally, but I think the automatic and continuous aspect of Cloud Build is much better than manually building changes.
An added benefit is that after the build completes, anyone configured to receive notifications on your team will be notified of the new version.
Verdict and Conclusion
I highly recommend Cloud Build – even for small projects and indie developers. It’s saved me a ton of time over the past year (especially with iOS builds). Being able to automatically build and testing all your changes as your commit them is great as well. I believe it’s a best practice to continuously deploy and test your project, even in early development changes. This allows you iterate quickly while not getting bogged down in the “operations” of deployment and testing.
The build time is a bit slower for PC and Android builds but for iOS it’s definitely quicker. I develop 100% of the time on Windows and my previous workflow looked like this:
- Commit changes from Windows to remote repo
- Pull latest changes to Mac
- Build XCode project from Unity
- From XCode build .IPA file
The entire process took 30~ minutes and was tons of manual work. It’s mostly the limitation of iOS and Apple imposed restrictions, but being able to allow Cloud Build to automatically do the builds has saved me tons of time. It’s also allowed us to push the latest builds to testers at a much higher rate.
You’ll need a “Teams Advanced” subscription ($9/month) but this is included with all Unity Plus and Unity Pro subscriptions.
I hope this tutorial helps, let me know if you have any questions!
Interested in learning more Unity skills? Check out my other Unity tutorials.

Jonathan
Hey there, I’m Jon! I love landscape photography which is why I travel all the time! On my blog I’ll share all the best spots for epic sunsets and sunrises as well as some photography tips and tricks. I also have a interest in game design so you’ll find the occasional post about that too. Thanks for visiting!