6 Tips To Improve Your Milky Way Photography
The milky way is such fascinating and such a beautiful subject to capture. It’s a challenging yet highly rewarding experience to photograph the night sky. It’s something I’ve been slowly incorporating into my portfolio over the past couple years and here a few tips and tricks I’ve learned over the years that have helped me improve my milky way photography / astrophotography.
For this post, I assume that you are familiar with the basics of night photography (shutter length, ISO, f-stop, etc). I’ll write a post in the future for beginners but don’t be shy to ask in the comments if you have any questions!
Research and Plan For Your Epic Shot
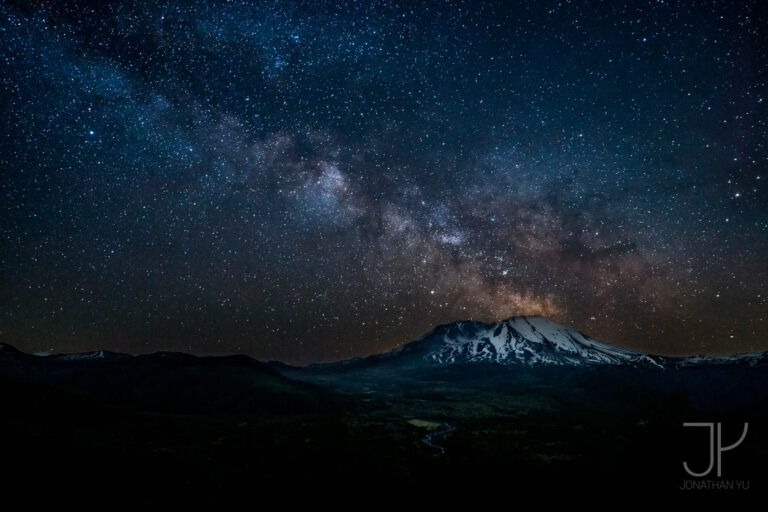
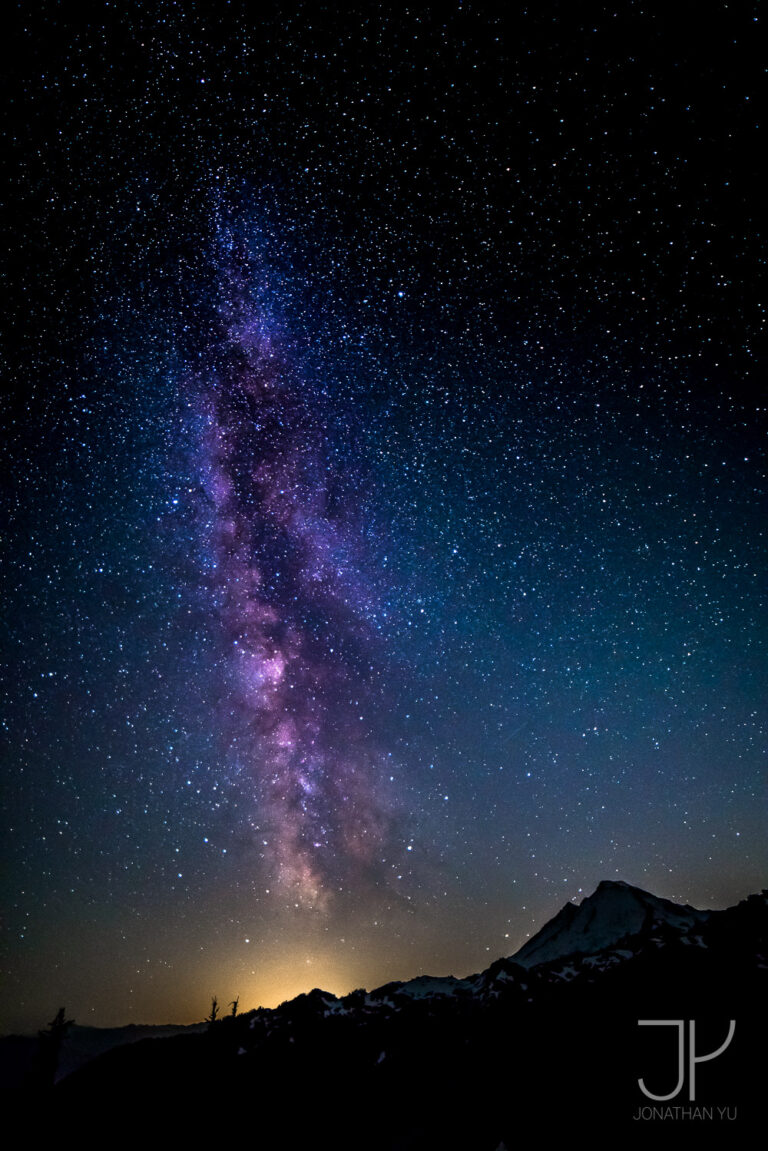
The most important thing to do diligent planning and research before heading out for your epic night under the stars! There’s a ton of factors that need to fall into place to be able to capture the milky way, one could say the stars have to align! An ideal night would have dark skies, minimal cloud coverage, and proper alignment / composition for the foreground you are shooting.
For dark skies, the easiest way would be to check a lunar calendar and find out when is the next new moon phase. During the new moon phase, the moon is not visible which gives you a darker sky. You can capture the milky way on most nights but the darker night you get, the higher your chances and the more time you’ll have.
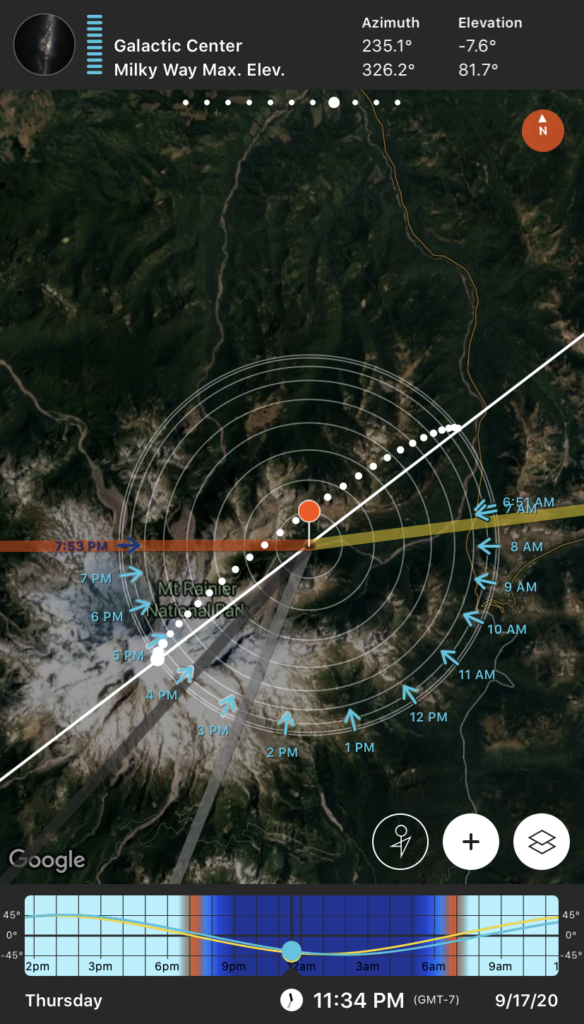
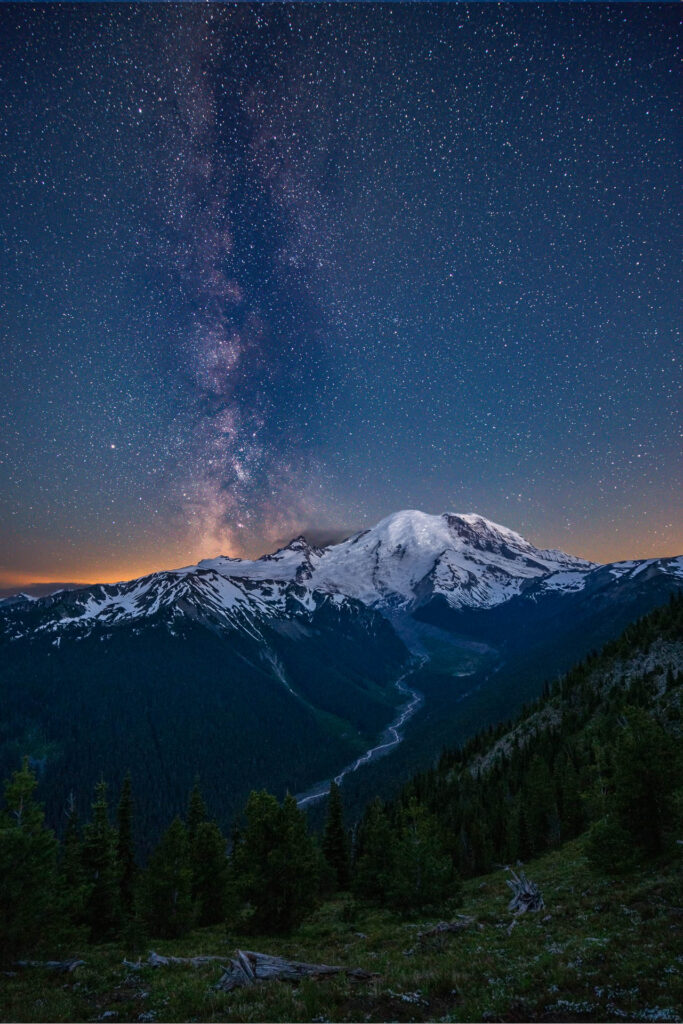
It’s also important to know where the milky way will rise and when the core will be visible. I use an app called Photo Pills to do this. The app has a ton of features that help you plan all sorts of shots but the most important one is the map planner feature. This lets you see exactly where the milky way will be throughout the night and even the alignment.
Check out the following screenshot to see what I mean. The milky way will be vertically aligned directly over Mount Rainier around 11:30 PM on 9/17/20.
With proper planning and research, you can cut out a lot of trial and error. Just hope that the weather and clear skies is on your horizon!
Scout the Location
It’s extremely hard to see in the dark. Even if you had the eyes of an owl, finding the right composition in the dark would be tough! If you want your shot to include a compelling foreground, I would suggest checking out the location during the day and find the foreground and composition that you want to include. Shoot a couple shots for yourself so that when you come back later at night you’ll be able to setup quickly.

Use a sturdy tripod
This one might seem pretty obvious but in my opinion the tripod is one of the most important pieces to a landscape photographers kit. Astrophotography requires long exposures and without a tripod you can trust you’re just standing on shaky legs. It’s often windy at night and you might be in a not so flat location. Being able to do consecutive shots from the exact same position without and shake and vibration goes a long way in capturing crisp and tack sharp images.
There are many great tripods out there, but generally the bigger the sturdier. Carbon fiber tripods will be more stable than aluminum as well. (They are better at dampening vibrations and shocks). To see my gear list, click here.
Use a remote or timer
To the tune of sturdy and stable foundations, using a remote or timer mode to press the shutter will further reduce the risk of shocks or unwanted movement. If you plan to do any image stacking, touching your camera at all during the capture is a bad idea! I’ve forgotten my remote a couple times and learned the hard way. Even when you’re being careful the camera might move ever so slightly. The slightly misaligned images adds extra overhead to your post processing workflow, so save yourself the time and pack the remote.
If your camera has the ability to shoot on a timer, that’s helpful as well. I configure mine to shoot on a 2-second timer, so the shutter isn’t opened until 2-seconds after the remote or shutter button is clicked.
If you are stacking your images, it’s also useful to configure your camera to just capture all the frames automatically. On Sony cameras, that function is called Interval Shooting. This allows you to configure the # of frames you wish to capture and the exposure of each frame. Once started, it will sequentially capture all the configured frames for you.
Stack your images
Stacking images goes a loooooooong way in noise reduction and really helps you create high quality images. It’s more of an advanced post-processing technique but isn’t to difficult to learn. It’s time consuming but makes a big difference in the final image.
Basically the way it works is you take a bunch of images from the same spot. During post processing, the software will take each of the individual images and using the data from each of the image, create a single, noise-reduced output image. Then you can take this image and continue with your normal post-processing.
I use a free program called Sequator to stack my images.
Blend your Foreground
Another advance technique, but really makes a difference in the quality of the photo. Blending of the foreground basically means you are combining a foreground image with a sky / star image. This allows you to properly expose for both the foreground and the sky. A normal milky way photo would only be exposed for the sky, which leaves the foreground extremely dark. If you push the brightness and shadows to reveal the foreground, you end up with an extremely noisy image.
Here are two ways to approach this:
- Capture the foreground during twilight. This is when it’s getting dark enough to see some of the night sky but still bright enough to see the foreground. You still need a long exposure but you’ll be able to keep your ISO down. I aim to capture foreground when it’s bright enough to shoot something like ISO 100-640 and expose at (2 minutes – 20 seconds). How long you expose for depends on the foreground. If there’s moving elements (like trees or water) I may aim for a higher ISO but shorter exposure. If it’s a static object, then I’ll capture a foreground image at lower ISO for more detail.
- Capture the foreground at night. This is highly time consuming but gives a more ‘realistic’ image as you can do the foreground right after or before you capture the sky. You’ll need an extremely long exposure and probably still end up with a pretty high ISO but at least the foreground will be exposed properly. Depending on how dark it is, you may try something like (ISO 800, 10~ minutes) or (ISO 1600, 6~ minutes). The problem with this approach is that it takes a long time to expose the shot (even longer if it’s extremely dark out) and if it doesn’t turn out great, you need to spend even more time to correct it. Depending on your camera, you may be happy with a compromise like ISO3200, 4 minutes.
Conclusion
To recap on the 6 tips to improve your milky way photography:
- Research and Plan For Your Epic Shot
- Scout the Location
- Use a sturdy tripod
- Use a remote or timer
- Stack your images
- Blend your Foreground
In future posts, I’ll go into more details of different techniques like blending and image stacking, so stay tuned!
Don’t forget to connect with me on Instagram (@xjjon). I share most of my images there. Feel free to drop me a message if you have any questions or just want to chat about photography!
Which one helped you the most? Let me know in the comments below!

Jonathan
Hey there, I’m Jon! I love landscape photography which is why I travel all the time! On my blog I’ll share all the best spots for epic sunsets and sunrises as well as some photography tips and tricks. I also have a interest in game design so you’ll find the occasional post about that too. Thanks for visiting!